Problem analysis and suggestions - reply part 2
your recipe...
Chausiubao on 03-02-2006 said:
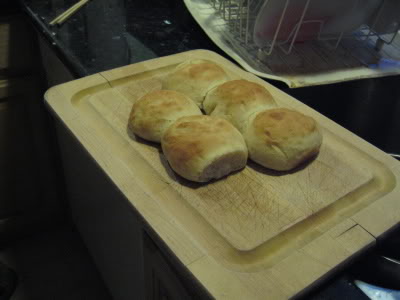
This is a free form sweet bread
3 C. Flour
1 C. Water
3 Tbsp. Sugar
2 Tsp. Yeast
1] Dissolve Sugar in warmed water and stir in Yeast, let rest for 10 min or until foamy
2] Mix in flour with chopsticks/wooden spoon until the dough begins to pull away from the bowl
3] Flour a work surface and place the dough onto it and knead for 10 min
4] Once the dough is smooth and elastic oil the mixing bowl and cover with plastic wrap, let rest for 3 hours
5] Once dough has risen, release the gas and divide the dough into 24 pieces, and place onto greased baking sheet, brush with eggwash and preheat oven to 400* F
6] Let rise for an additional hour or until oven has preheated
7] Bake at 400 for 17-18 min
PROBLEM ANALYSIS AND SUGGESTIONS
Now let's address your problems, analyzing each of them in turn
explicitly for the recipe you posted. I am going to assume that you
did increase the water slightly as I recommended in part 1 of my reply.
Chausiubao on 02-27-2006 said:
PROBLEM #1 often I find that there isn't a noticeable difference between the punched down dough and the second rise
> Don't go by *times* in the recipe but by the *amount* the dough rises. For rise #1 (the rise in the bowl), you want your dough to double in bulk. Your dough has
plenty of yeast and sugar so, assuming it is rising at "room temperature" (from 72-75F) and is well-kneaded, 3 hours is excessive. As yeast rises it tends to create a slightly acidic environment which, if allowed to go on too long, actually can start create a poor environment for growth, effectively killing off or weakening some of the yeast. You want your yeast to remain vigorous and able to multiply. Don't let it over-rise.
> Don't actually "punch down" your dough. Especially for a dough that has about 65% water (which is what I recommended) it should be sufficient merely to
gently scoop the dough from your bowl to the board.
Be gentle in order not to get rid of all those lovely gas pockets that were created in rise #1. The dough is handled a lot in step 5 of your recipe (the instructions say to divide into 24 pieces - I assume you're making rolls here - and each piece is shaped) so there's no need to punch it down beforehand.
> Use a knife or a dough scraper to divide the dough into those 24 pieces rather than tearing it. Again, this preserves those gas pockets.
> Don't brush each piece with eggwash *prior* to the 2nd rise (on the baking sheet). This serves no purpose. If you intend to apply an eggwash, it should be done
just prior to placing the rolls in the oven.
> Once your pieces are on the baking sheet, cover the whole sheet loosely with plastic wrap in order to reduce water evaporation and prevent the exterior from drying out during the 2nd rise.
Chausiubao on 02-27-2006 said:
PROBLEM #2 not much oven spring, even with the addition of steam
An Aside: A Brief Analysis of Oven Spring
Oven spring for freeform bread is produced primarily by a combination of these factors: [1]the moisture content of the risen dough AND [2]the initial heat of the oven AND [3]the "surface tension" of the dough. Think about this process for a moment. High heat plus dough moisture produces steam in the dough when it is placed in the oven. Steam rises *up*. "Surface tension" (a technique for shaping dough which produces, in effect, a semi-permeable barrier to steam) means that steam does not immediately escape from the dough. Result? - the dough is pushed up resulting in good oven spring.
To some extent, the vitality of the yeast in the risen dough also contributes to oven spring. The concept here is that the oven heat stimulates yeast growth and, in the brief initial stages of baking, yeast multiplies rapidly (producing gas as a by-product of yeast growth) until the heat penetrates the dough, killing the yeast and therefore ending the "oven spring".
In practical terms, the best way to achieve this result is a good baking surface - specifically a preheated baking stone (or tiles). A quality baking stone delivers strong heat to the bottom of the bread and, (since it is slightly porous), draws some moisture down. This results in a more even texture and open crumb throughout the finished bread as well as crisping (without burning) the bottom of the bread. Even in a hot oven, other baking surfaces tend to produce bread that has smaller holes at the bottom of the bread (a denser crumb) and bigger holes (a more open crumb) towards the top of the bread.
Home steaming methods assist in oven spring but are really not the primary determinant. Their effectiveness depends strongly on the type of oven you have at your disposal.
Let's go back to your recipe and see how you can get better oven spring.
> During the 2nd rise, the pieces should rise to 1-1/2 to 2 times the original bulk. Again, it is the *amount* of rise, not the time, that is important. If you let the dough over-rise at this point, there is no way you'll get much oven spring no matter how much steam you can introduce.
> Increase the size of the pieces. Dividing a recipe that procdues 23 oz of dough into 24 pieces means each dough piece is slightly less than 1 oz (?about the size of a ping-pong ball?). You have very little mass for each piece which means that steam expansion probably has little opportunity to occur. Reduce the number of pieces, making each piece about 1-1/2 larger than the original recipe or about 1-1/2 oz each (?slightly larger than a golf ball?).
> The recipe's oven temp of 400F is too low. If you are *not* using any home steaming methods, preheat the oven to
450F rather than the 400F recommended in the recipe. If you *are* using home steaming methods, preheat the oven to
500F. After steaming (which should take about 5 min),
immediately reduce oven heat to 450F for the rest of the baking period. Home steaming methods involve periodic opening and shutting of the oven door, which tends to reduce the actual oven heat (the average reduction is about 50F). The initial heat of 500F is designed, in part, to compensate for this unavoidable loss of oven heat.
This recommendation assumes that you've increased the size of your pieces.
> If you want to have a crackly thin crust on your baked product,
skip the eggwash prior to placing the dough in the oven. Brushing the dough with eggwash (whole eggs or egg whites only) or oil/butter creates a barrier to the escape of steam. You might, therefore, think that eggwash will help oven spring. However, oven spring, as well as the desired balance between crumb and crust, is a delicate balance between the escape and retention of steam during the baking process. My recommendation is to skip any kind of "wash" on the surface of the dough just prior to baking. Master the recipe without it. Then experiment with it to see its effects.
Chausiubao on 02-27-2006 said:
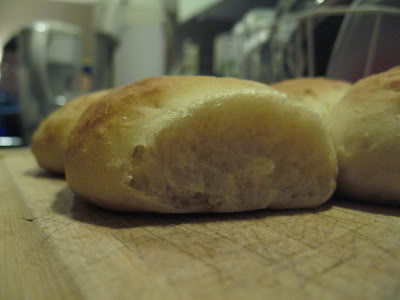
PROBLEM #3 I've been having issues with getting nice caramelization of the upper crust without creating a ridiculously dark or hard bottom crust
> The baking time of 17-18 min at 400F in the original recipe may be a little too long, given that you have 24 1-oz pieces spread out on a baking sheet. If you take my suggestions and [1]increase the water content and [2]increase the size of each piece to about 1-1/2 oz, then my
suggested baking times would be
Without Oven Steaming- intial oven temp at 450F - about 15 minutes
With Oven Steaming- intial oven temp at 500F - 5 minutes during steaming plus (after reduction to 450F) about an additional 7-10 minutes
Caveat: I'm only guessing at baking times here. However, whether you're using home steaming methods or not, after the first 5-7 minutes, you won't harm the bread by opening the door and checking on the progress of your rolls. Figure out the baking times that work for the revised recipe, your oven and your baking pan.
> problems re. getting a nice brown crust without burning the bottom of the bread can be the result of your equipment. Basically, your baking surface is too hot (and not absorbant on the bottom) even though your oven temp is appropriate for the caramelization of the upper crust. You can't change your oven (aside from investing in a quality baking stone or lining your oven rack with tiles) but if you have a
rimmed baking sheet maybe this suggestion will help...
Invest in a roll of parchment paper and some coarse cornmeal.
At step 5 of your recipe, do not grease the sheet. Instead, place a 1/4" layer of cornmeal on the rimmed baking sheet and place a sheet of parchment paper on top of the cornmeal. Put your dough pieces on the parchment paper, cover loosely with plastic wrap and let rise.
Bake at the temperatures and for the times suggested above.
The idea of this approach is that the layer of cornmeal provides a buffer between the heat of the bottom of the baking sheet and the bottom of the bread. The cornmeal should conduct heat from the bottom of your baking pan but should prevent the bottom of the bread from scorching. Parchment paper is semi-permeable, which simply means that it allows some moisture to move between it. Therefore you should have an arrangement that helps with oven spring.
I hope you find some of these ideas helpful. Best of luck with all your baking efforts.
 and frustrated