JoeV
Washing Up
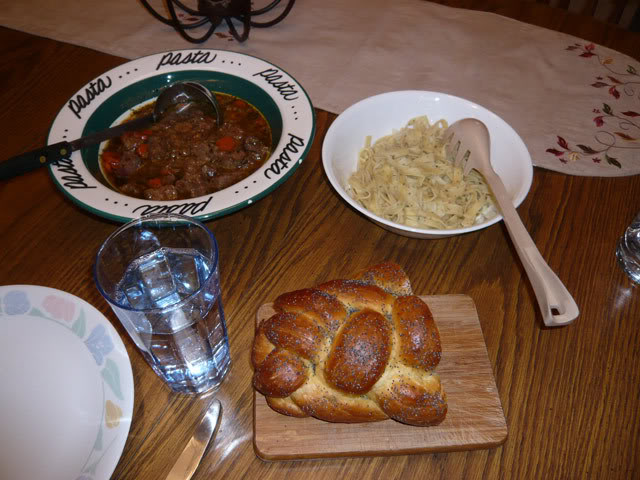
I had the day free so I decided to make my own noodles to go with the beef stew we were having for dinner. I researched a bunch of recipes then put together what I thought would make good noodles (isn't that what creativity is about? ). I was pleasantly surprised that I nailed it the first time. Here's my recipe, which I'm sure may have already been dreamed up, but I'm too lazy to read that far back in the archives.
1 C All purpose flour
1 Egg
1 t Salt
1 T Extra Virgin Olive Oil
1 ½ t Basil (Oregano should also work well)
2 T Water (as needed)
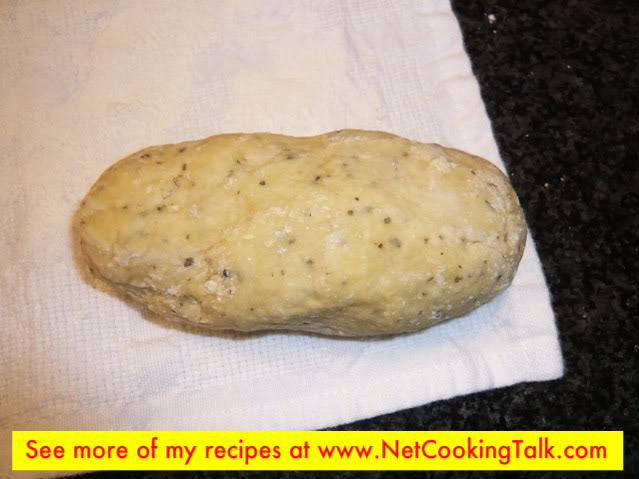
Blend flour, salt and basil in a bowl. Break the egg in a separate dish to avoid any shell fragments. Make a depression in the flour mix and pour in the egg and olive oil. With a fork mix the egg and oil and slowly draw in flour to the center until you cannot blend with the fork. Continue blending in the flour using your fingers, adding water as needed, 1 T at a time. Dough should be firm and not sticky. If sticky, add a bit more flour until dough is smooth and slightly dry to the touch. Roll finished dough into a log and cut into three pieces to be rolled out.
If using a pasta machine, follow machine directions for making noodles, using one section of dough log at a time. Finished dough should be rolled on lowest setting. Be sure to allow rolled out dough to dry a bit before feeding into noodle rollers. Never put sticky dough through the machine rollers.
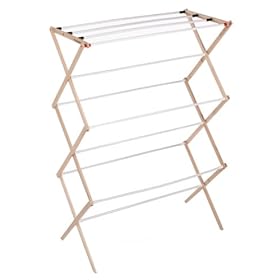
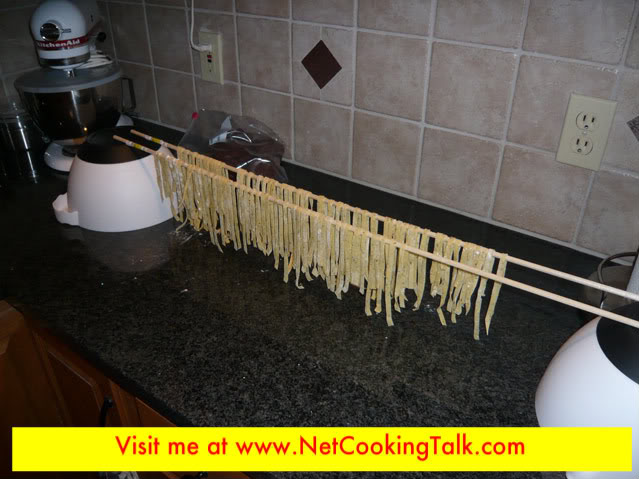
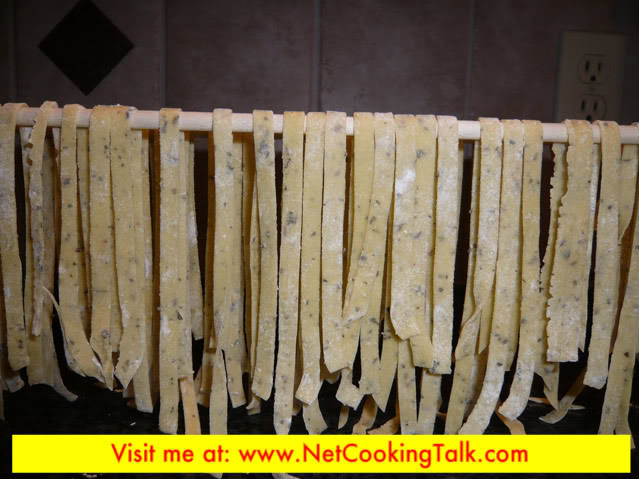
If using a rolling pin, roll dough to 1/16” thick or a little thinner, turning the dough from front to back several times on a floured surface. Allow to dry for 10 minutes (you can lightly flour the dough to speed up drying if it’s tacky). Roll up the dough into a log like a jellyroll, and cut the log into ¼” wide segments using a very sharp knife on a cutting board (to save the edge on your knife). Unroll segments and allow to dry on a pasta drying rack or on a flour dusted linen towel for about ½ hour. (This is my homemade dryer)
Coil up pasta into loose piles and put in freezer in an air-tight container, or cook in salted water or stock about 15 minutes to use immediately.
Here was dinner, and there was nothing left when me and DW got finished with it (We were piggies tonight). The noodles were just like store-bought in texture, and held together nicely.
JoeV
). I was pleasantly surprised that I nailed it the first time. Here's my recipe, which I'm sure may have already been dreamed up, but I'm too lazy to read that far back in the archives.Flat Egg Noodles with Basil
Makes 6 ½ oz of noodles ~ enough for 3-4 people
Makes 6 ½ oz of noodles ~ enough for 3-4 people
1 C All purpose flour
1 Egg
1 t Salt
1 T Extra Virgin Olive Oil
1 ½ t Basil (Oregano should also work well)
2 T Water (as needed)
Blend flour, salt and basil in a bowl. Break the egg in a separate dish to avoid any shell fragments. Make a depression in the flour mix and pour in the egg and olive oil. With a fork mix the egg and oil and slowly draw in flour to the center until you cannot blend with the fork. Continue blending in the flour using your fingers, adding water as needed, 1 T at a time. Dough should be firm and not sticky. If sticky, add a bit more flour until dough is smooth and slightly dry to the touch. Roll finished dough into a log and cut into three pieces to be rolled out.
If using a pasta machine, follow machine directions for making noodles, using one section of dough log at a time. Finished dough should be rolled on lowest setting. Be sure to allow rolled out dough to dry a bit before feeding into noodle rollers. Never put sticky dough through the machine rollers.
If using a rolling pin, roll dough to 1/16” thick or a little thinner, turning the dough from front to back several times on a floured surface. Allow to dry for 10 minutes (you can lightly flour the dough to speed up drying if it’s tacky). Roll up the dough into a log like a jellyroll, and cut the log into ¼” wide segments using a very sharp knife on a cutting board (to save the edge on your knife). Unroll segments and allow to dry on a pasta drying rack or on a flour dusted linen towel for about ½ hour. (This is my homemade dryer)
Coil up pasta into loose piles and put in freezer in an air-tight container, or cook in salted water or stock about 15 minutes to use immediately.
Here was dinner, and there was nothing left when me and DW got finished with it (We were piggies tonight). The noodles were just like store-bought in texture, and held together nicely.
JoeV