EvillyChic
Assistant Cook
Hello every one,
Today, I want to share one of my favorite pastry recently: Portuguese Egg Tart.
Portuguese egg tarts were evolved from “pastel de nata“, a traditional Portuguese custard pastry that consists of custard in a crème brûlée-like consistency caramelized in a puff pastry case.
The history of Portuguese Egg Tart itself is very interesting. It was all started more than 200 years ago. During this time in Portugal, the religious communities of Portugal produced large quantities of eggs and used egg whites to starch of clothes and clear of wines. So what to do with the leftover egg yolks? They used them to create various pastry and confections, resulting in a proliferation of sweet pastry recipes throughout the country. The famous Portuguese Egg Tart was one of them, created by Catholic Sisters at Jerónimos Monastery in Lisbon.
Who knows where creativity brings you? It is now a super popular pastry in every pastry shop around the world owned by Portuguese descendants.
Also, they are sold then at KFC restaurant chain across Asia and Southeast Asia, make them popular among Asian countries and China special administrative regions such as Singapore, Malaysia, Thailand, Taiwan, Macau and Hong Kong, etc.
I first knew about this tart from KFC. One time, I went to our favorite KFC spot in HCMC when they were promoting these. They asked if I wanted to try. It looked so irresistible, so why not? Since then, I have been in love with this pastry. But it’s so expensive buying them from the shops, comparing to its easy-to-find ingredients and easy-to-make nature; especially now I are studying in Finland. I decide to make them myself.
So here we are: how I make Portuguese Egg Tart. (12 mini tarts)
Ingredients
Tart crust
Instructions
Step 1: My puff pastry is already cut into rectangles like this, 125g per, so I use 4. Roll them in to tight cylinders. Stick layers of dough up at the end of the roll using a bit of water.
Step 2: Cut each cylinder into 3 smaller ones. 3 multiplies by 4 is 12, that’s how I divide mine. If yours comes in bigger or smaller size, divide them accordingly to have 12 even balls of puff pastry.
Step 3: Dip every ball into a dish of flour generously. Then roll them out into a thin round sheet with the cycle side facing up, like this.

Here is where my mistake happened. I should have roll these a bit thin toward the edge, leave the inner thicker because the filling will make the puff pastry crust wet while baking and make the tart more fragile that usual egg tart. So learn from my mistake.
Try one of them into your mini tart pan and adjust the side so that there is a bit of puff pastry lean over the ring of your pan. Wonder why? Next step, please.
Step 4: Prepare your tart pans by grease the with melted butter, or put some cupcake paper cups in, like me. This is very important because if you don’t, the tart will stick heavily to your pan. Then adjust all the crust into your tart pan, in my case, cupcake pan.
The reason why I ask you to make the size of the crust a bit bigger because the puff pastry has its nature to shrink back a bit while being baked. So this extra step is to make sure that your crust is at best shape after baked. Furthermore, this makes my tarts look like blooming tulips when finish, very cute, so I recommend it.
Step 5: Preheat your oven to 200 degree Celsius. Prepare a rack on the last level.
It’s time to make the custard filling.
Step 6: Separate your eggs. Put eggs and yolks into one bowl with all the sugar. Beat them lightly with your whisk until there is no string of egg white left.
Step 7: Add heavy whipping cream and milk into the egg mixture above, whisk until everything combined. Add the vanilla extract. And you are done.
Originally, the filling must be made by double boiling method, meaning the egg mixture must be cooked on a heatproof bowl that stay on top of a boiling pan, until it thicken up. Then let cool to room temperature for about almost 1 hour. I decide to go shortcut on this since Bear was OK with that the last time and I do not wish to prolong my baking time further. It totally depends on you to choice how you want to do in this situation.
Step 7: Pour the filling into the prepared tart pans, through a strainer.
http://simplyafoodblog.wordpress.co...tart-one-of-bears-favorite-pastries/_mg_6609/
Remember; do not fill up the cup. Only fill up to 2/3 of it, please. Because the egg filling will expand quite a lot during baking, so if you fill it up fully, there is a high chance that your filling is gonna erupt. And that’s a hell lot of oven cleaning, you don’t even want to imagine. Mine erupt a bit too, but luckily, minor damage.
Step 8: Put the tarts into the preheated oven, last rack.
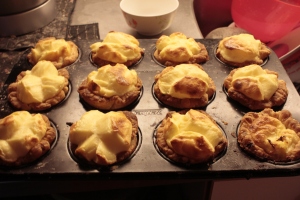
Step 9: Bake them for 25 to 30 minutes or until the top of the custard caramelize a bit. During the baking time, if you see that your fillings are popping up like balloons. That’s totally normal.
Please resist your temptation to open the oven door while those precious are being baked, I highly insist. Egg custard is extremely sensitive with change in heat. Inconsistent temperature during baking causes the custard to “explode” or crack on its surface, like mine here. I just did a little sneak and that is my punishment.

Definitely not pretty, isn’t it? But that is still edible, and I guarantee, still as good as new. At first they are like balloons when coming out. But after 5 minutes of cooling in room temperature, they will be like this.
 5 minutes out from the oven
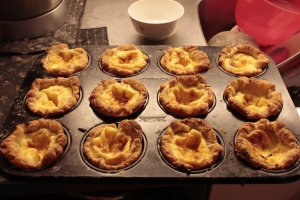
Very artistic look, indeed. With all the cracking, and caramelizing, and see? I told you, they look like blooming tulips. LOL, I run wild with my imagination these days, excuse me.
Step 10: Take the tarts out of the pan. You can enjoy them now, as they are warm, some forks prefer that. Personally, I enjoy them cool, because by then, the crust will be settled and less fragile, and the filling is more enjoyable. If you prefer mine, put them in the fridge for 30 minutes before serving.
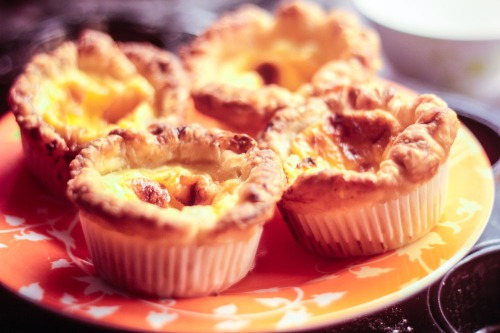
Here they are.
 Portuguese Egg Tart - Baked
And here is another picture showing the innards.
 Egg tart innards
Eating these tarts are like having a Fandango dance on your tongue. The buttery flavor of puff pastry combines with the soft, rich custard. Uhhmm. My limited vocabulary cannot fully explain this.
Hope you enjoy the recipe. Happy Baking!
Rose,
Today, I want to share one of my favorite pastry recently: Portuguese Egg Tart.
Portuguese egg tarts were evolved from “pastel de nata“, a traditional Portuguese custard pastry that consists of custard in a crème brûlée-like consistency caramelized in a puff pastry case.
The history of Portuguese Egg Tart itself is very interesting. It was all started more than 200 years ago. During this time in Portugal, the religious communities of Portugal produced large quantities of eggs and used egg whites to starch of clothes and clear of wines. So what to do with the leftover egg yolks? They used them to create various pastry and confections, resulting in a proliferation of sweet pastry recipes throughout the country. The famous Portuguese Egg Tart was one of them, created by Catholic Sisters at Jerónimos Monastery in Lisbon.
Who knows where creativity brings you? It is now a super popular pastry in every pastry shop around the world owned by Portuguese descendants.
Also, they are sold then at KFC restaurant chain across Asia and Southeast Asia, make them popular among Asian countries and China special administrative regions such as Singapore, Malaysia, Thailand, Taiwan, Macau and Hong Kong, etc.
I first knew about this tart from KFC. One time, I went to our favorite KFC spot in HCMC when they were promoting these. They asked if I wanted to try. It looked so irresistible, so why not? Since then, I have been in love with this pastry. But it’s so expensive buying them from the shops, comparing to its easy-to-find ingredients and easy-to-make nature; especially now I are studying in Finland. I decide to make them myself.
So here we are: how I make Portuguese Egg Tart. (12 mini tarts)
Ingredients
Tart crust
- 500g store-bought puff pastry
- 150g heavy whipping cream
- 200g whole milk
- ¼ tsp. vanilla extract
- 60g granulated white sugar
- 2 whole egg + 2 egg yolk
Instructions
Step 1: My puff pastry is already cut into rectangles like this, 125g per, so I use 4. Roll them in to tight cylinders. Stick layers of dough up at the end of the roll using a bit of water.
Step 2: Cut each cylinder into 3 smaller ones. 3 multiplies by 4 is 12, that’s how I divide mine. If yours comes in bigger or smaller size, divide them accordingly to have 12 even balls of puff pastry.
Step 3: Dip every ball into a dish of flour generously. Then roll them out into a thin round sheet with the cycle side facing up, like this.

Here is where my mistake happened. I should have roll these a bit thin toward the edge, leave the inner thicker because the filling will make the puff pastry crust wet while baking and make the tart more fragile that usual egg tart. So learn from my mistake.
Try one of them into your mini tart pan and adjust the side so that there is a bit of puff pastry lean over the ring of your pan. Wonder why? Next step, please.
Step 4: Prepare your tart pans by grease the with melted butter, or put some cupcake paper cups in, like me. This is very important because if you don’t, the tart will stick heavily to your pan. Then adjust all the crust into your tart pan, in my case, cupcake pan.
The reason why I ask you to make the size of the crust a bit bigger because the puff pastry has its nature to shrink back a bit while being baked. So this extra step is to make sure that your crust is at best shape after baked. Furthermore, this makes my tarts look like blooming tulips when finish, very cute, so I recommend it.
Step 5: Preheat your oven to 200 degree Celsius. Prepare a rack on the last level.
It’s time to make the custard filling.
Step 6: Separate your eggs. Put eggs and yolks into one bowl with all the sugar. Beat them lightly with your whisk until there is no string of egg white left.
Step 7: Add heavy whipping cream and milk into the egg mixture above, whisk until everything combined. Add the vanilla extract. And you are done.
Originally, the filling must be made by double boiling method, meaning the egg mixture must be cooked on a heatproof bowl that stay on top of a boiling pan, until it thicken up. Then let cool to room temperature for about almost 1 hour. I decide to go shortcut on this since Bear was OK with that the last time and I do not wish to prolong my baking time further. It totally depends on you to choice how you want to do in this situation.
Step 7: Pour the filling into the prepared tart pans, through a strainer.
http://simplyafoodblog.wordpress.co...tart-one-of-bears-favorite-pastries/_mg_6609/
Remember; do not fill up the cup. Only fill up to 2/3 of it, please. Because the egg filling will expand quite a lot during baking, so if you fill it up fully, there is a high chance that your filling is gonna erupt. And that’s a hell lot of oven cleaning, you don’t even want to imagine. Mine erupt a bit too, but luckily, minor damage.
Step 8: Put the tarts into the preheated oven, last rack.
Step 9: Bake them for 25 to 30 minutes or until the top of the custard caramelize a bit. During the baking time, if you see that your fillings are popping up like balloons. That’s totally normal.
Please resist your temptation to open the oven door while those precious are being baked, I highly insist. Egg custard is extremely sensitive with change in heat. Inconsistent temperature during baking causes the custard to “explode” or crack on its surface, like mine here. I just did a little sneak and that is my punishment.

Definitely not pretty, isn’t it? But that is still edible, and I guarantee, still as good as new. At first they are like balloons when coming out. But after 5 minutes of cooling in room temperature, they will be like this.
 5 minutes out from the oven
Very artistic look, indeed. With all the cracking, and caramelizing, and see? I told you, they look like blooming tulips. LOL, I run wild with my imagination these days, excuse me.
Step 10: Take the tarts out of the pan. You can enjoy them now, as they are warm, some forks prefer that. Personally, I enjoy them cool, because by then, the crust will be settled and less fragile, and the filling is more enjoyable. If you prefer mine, put them in the fridge for 30 minutes before serving.
Here they are.
 Portuguese Egg Tart - Baked
And here is another picture showing the innards.
 Egg tart innards
Eating these tarts are like having a Fandango dance on your tongue. The buttery flavor of puff pastry combines with the soft, rich custard. Uhhmm. My limited vocabulary cannot fully explain this.
Hope you enjoy the recipe. Happy Baking!
Rose,
